Git and Git hub : For Complete Beginners explained with commands
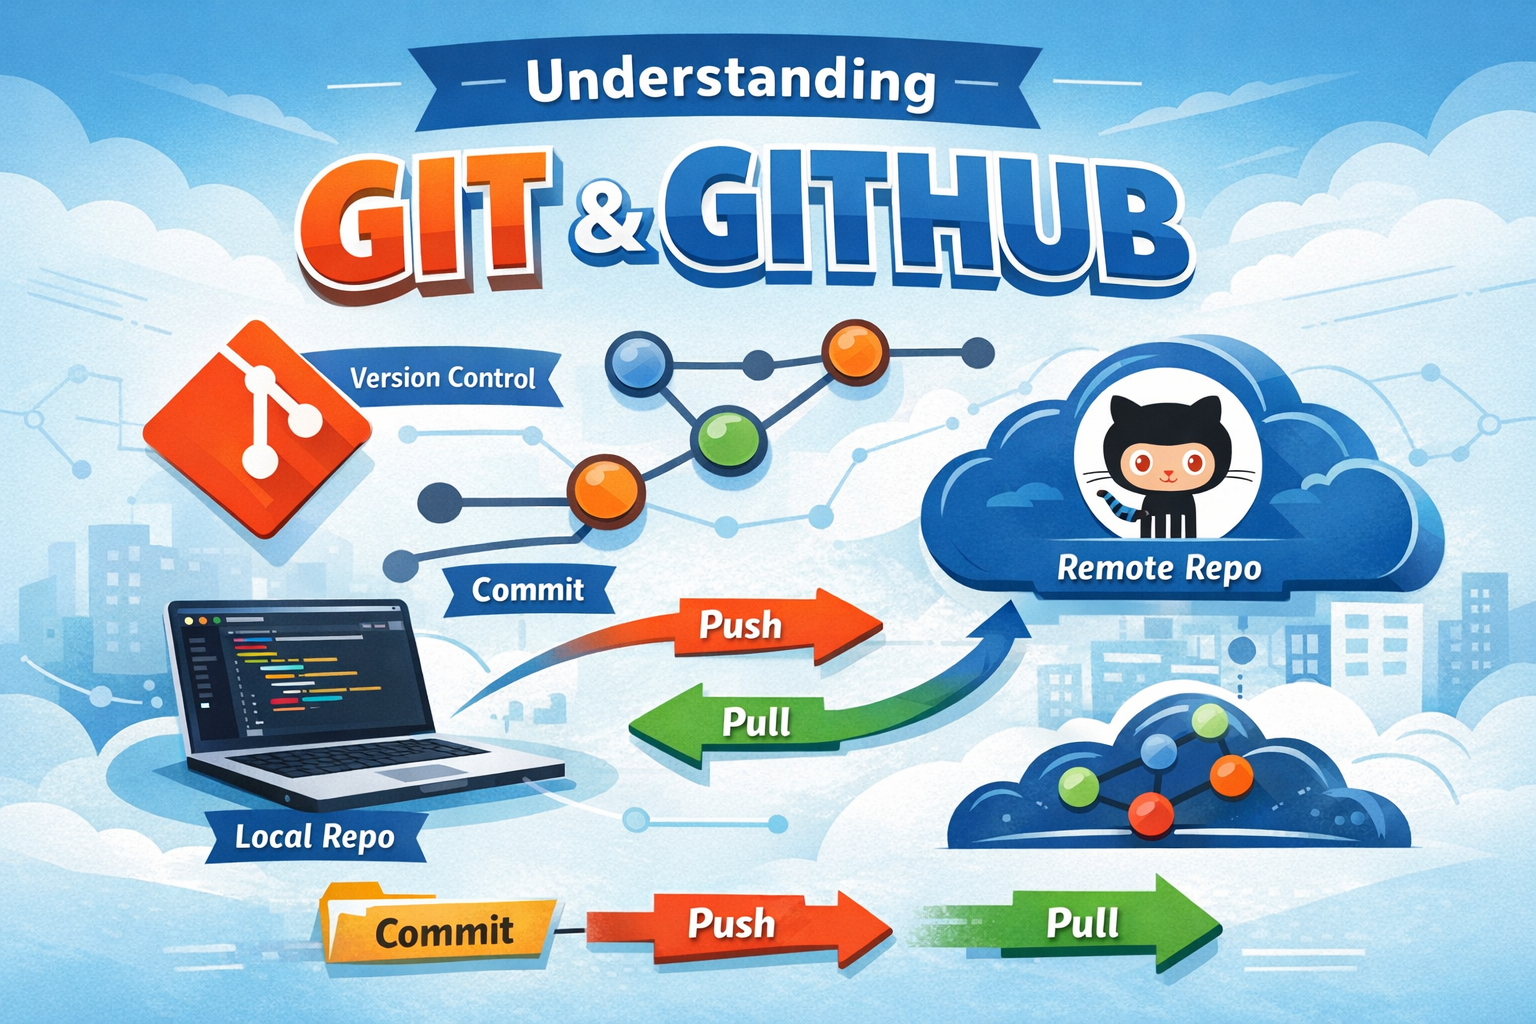
Before jumping into learning about git commands, let us understand what is Git and Git hub in layman’s language ??
What is Git and Git Hub ??
Git → it is a distributed version control system implemented as software, now what is version control system(VCS), it is tracking different version of the code and controlling them.
Other VCS in market are:
1. Mercurial(Distributed)
2. Subversion(Centralized)
Git Hub → It is remote server, which is use to push, pull and store the code for collaboration and managing code.
Other platforms in market are:
1. GitLab(Paid)
2. Bitbucket(Paid)
Git hub is most widely used remote server among all
Why is Git used ??
Now, consider you are working on a company’s project, so there will be many version of your code, to track all those versions and manage them, we use git(local repo). And the code can be stored in git hub(remote repo) so that it can accessed by other members of your team and work on it. Repo is nothing but a folder with .git folder containing all the history, objects, heads, etc
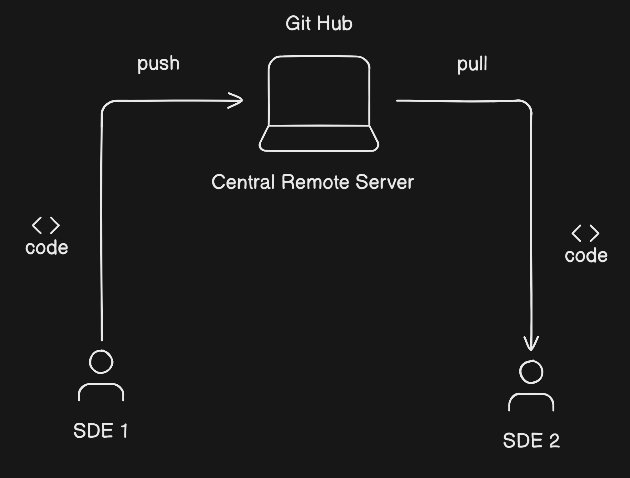
List of Git commands and there usage with workflow:
Git can be used only by git commands, here is list of all commands needed in the sequential order of usage, before that we need to setup our Git, Follow along me:
To setup Git:
Create a new file known as git.py and open integrated terminal, to setup git type:
git config --global user.name "Your name" //to add your username
git config --global user.email "youremail@gmail.com" //to add your email
Now to check you entered details, type:
git config --global user.name
git config --global user.email //entered email and username will appear
Now let us write some code in our git.py and learn about git commands:
a=10
print(a)
After writing our code, head back to terminal to write our first git command:
git init
now what does git init does ?? this commands start the initializing repositor in the current directory and creates a .git folder, automatically it will be hidden in the folder. Now lets add the folders that should be tracked by git:
git add git.py //only this file will be tracked
git add . //all files will be tracked(in case of a big code base)
now lets commit all our tracked files, basically it is like creating check point for code written as of now:
git commit -m "your message" //syntax
git commit -m "first commit"
In the above code, it is explained with syntax and congrats you made your first commit, now let us modify our code, by adding new code to git.py file
a=10
print(a) //old code
b=20
print(b) //adding this code to old code
Now we can check what all the changes we have made in our code using a git command called as git diff, lets try it out:
git diff
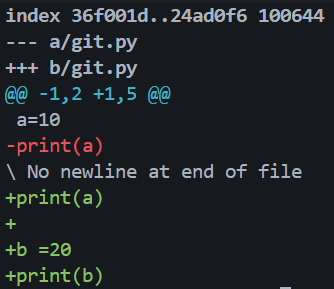
Code highlighted in red are the code line that are removed and code highlighted in green are the code line that are added newly. Make some new changes in code according to you and commit it once again as:
git add git.py
git commit -m "second"
Now once your execute this command after making certain changes in your code, lets list out all the commits you have made using git command:
git log
This command logs all the commits you have made(all the check point) and separate ID will be given to each commit, it will just look like this:
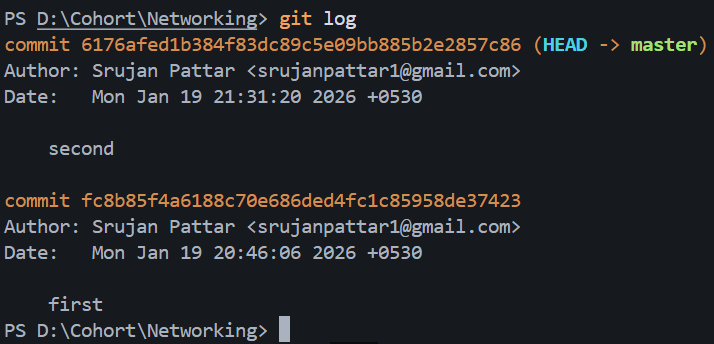
If this looks complex/messy for you, then get details about git logs in single line by a command:
git log --oneline
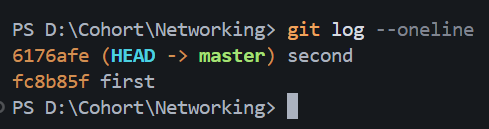
Here the git id is also shorten and If you look carefully, there is something mentioned as ‘(Head → master)’, if you have studied linked list then you will be knowing about concept called as head, it is nothing but it points to our your latest commit, since our latest commit was committed with message “second”, so head is point to latest commit. It makes traversing between commits easier, so If we add something to the code and later it turns out it was not of our use then, we can go back to our last code, by reverting head. let us understand it better by pictorial representation, consider we have 4 commits in our code then:
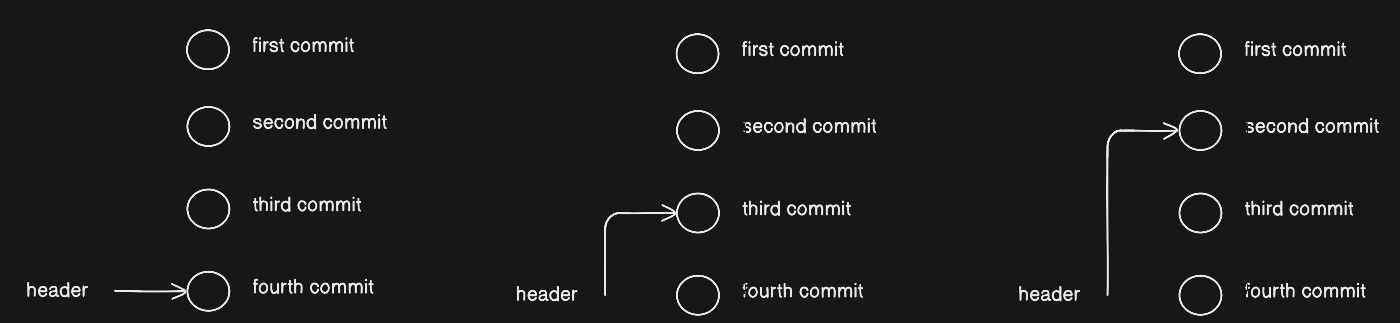
Lets understand this better, as we discussed by default head will point to last commit, so it is now pointing to our last commit (fourth commit), we can revert back to any other commit by keeping the last commit or by deleting the previous commit, by using commands:
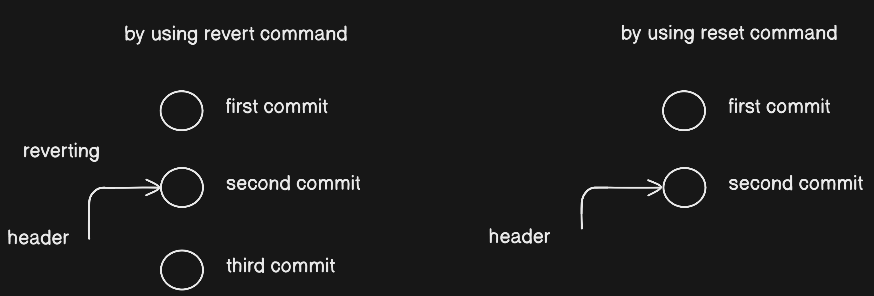
git revert <commit id> //this will create new commit and keep the last commit without deleting it
git reset --hard <commit id> //this will revert head back to 2nd commit and delete 3rd commit
Once after executing reset — hard, it will be looking like this

Problem of using this command is, it will delete all the previous commits and will jump to commit which you have mentioned in the command, so better to use git reset <commit id>, so that in case you release that the wrong code was right one, once again you can revert back to it.
even you can untrack the file using git command called as:
git rm <file_name>
Now it was all about working with git, now let us connect it to Git Hub, by creating a account in Git hub and creating a new repo there, once everything is done, it will something like this:
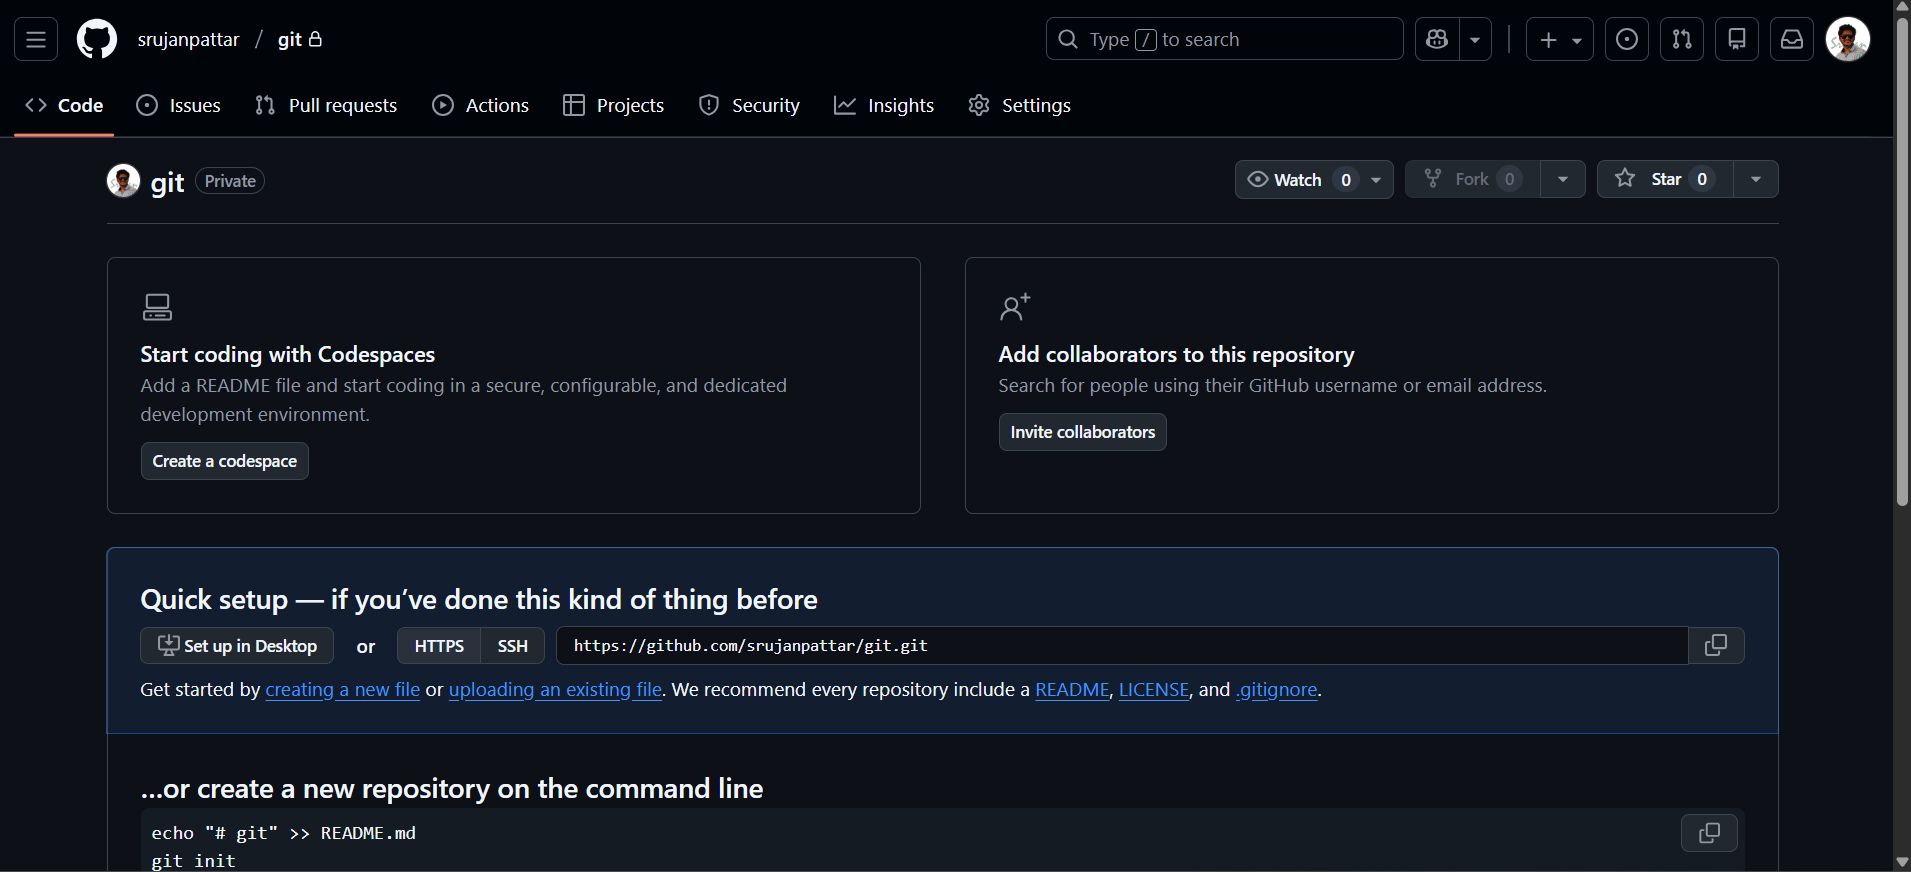
Copy the link, which is given as ‘https://github.com/srujanpattar/git.git’ in the above image, you will get a slightly different link as repo name will be different, once that is done, go back to terminal and type the following command:
git branch -M main
git remote add origin https://github.com/srujanpattar/git.git
Here are two commands, where first commands creates a branch renamed as main and second commands, link or add your code to the specified repo link, once git push is used, all the code will be pushed to the main branch, and the exact command is:
git push -u origin main
this command will push your code to the specified repo, and once you type this command and press enter, it will take some time and you will get output as this:
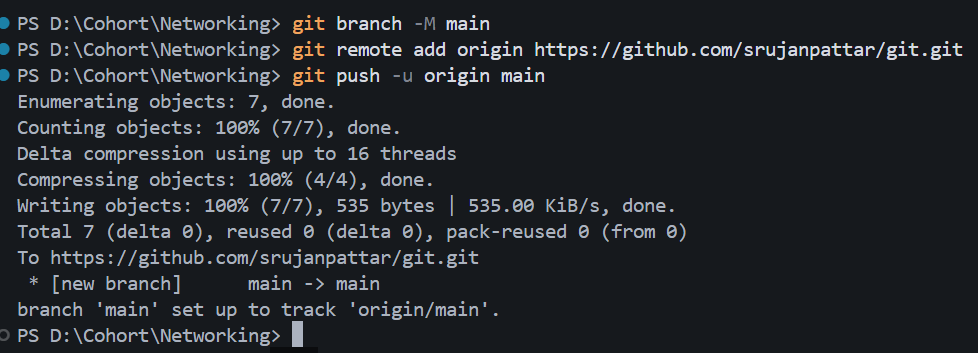
Once done with pushing your code to the repo, now go back to your git hub repo and refresh the site, you will end up to this:
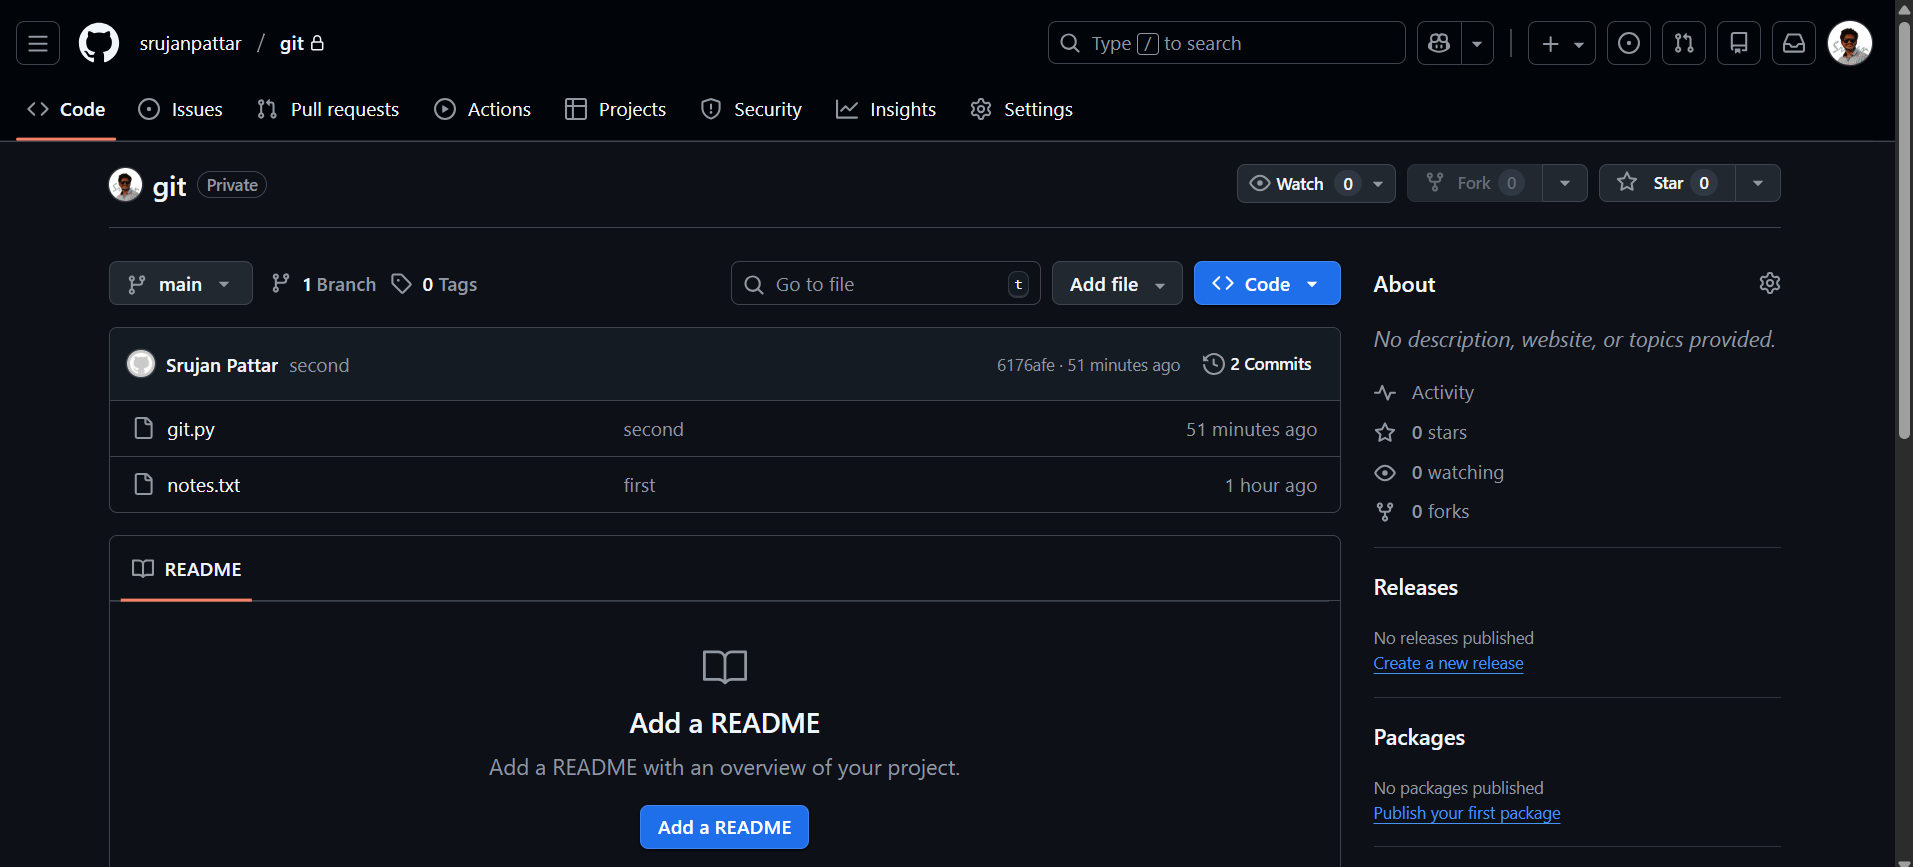
Congrats on pushing your code into Git Hub, here you will find some sections as Add a README, it is nothing but you write instructions or explain what is your code/project and how it should be executed, once this pulled to your pc. Let us summarize all the commands and there usage:
| Git commands | Usage |
git config - -global user.name <username> | to set username |
git config - -global user.email <email> | to set email |
git init | initialize git in the current directory and a hidden .git folder is created |
git add <file_path> or . | start tracking files and if . is used then all files are staged |
git diff | shows changes done in files (working directory vs staging area) |
git rm <file_path> | remove file from tracking and delete it from working directory |
git commit -m "message" | creates a commit |
git log | list all commits history |
git log --oneline | list all commits in one line |
git reset --hard | head goes back to mentioned commit id and discards later commits and changes |
git revert <commit_id> | creates a new commit and reverses the changes of the specified commit |
git remote add origin <repo_link> | link local repo to remote server |
git push -u origin <branch_name> | pushes code to remote repo for the first time |
git push -f | forced push, used when local history is rewritten and needs to overwrite remote history |